Leibniz.
Loading...
Teacher guide · School setup

Set up teachers, students, and classes

Add your school community, create each class, check invitations, and help late students join with a class code.

In this article

01Before you start

One person sets up the school list. Teachers then look after their own classes.

You need access to School Invite to add people for the whole school. Have each teacher and student’s school email address ready. A spreadsheet column is fine—you can paste many addresses at once.

  • Use the email address each person will use to sign in.
  • Check the spelling before you add anyone.
  • Group students by class if you are setting up several classes.

02Add teachers and students

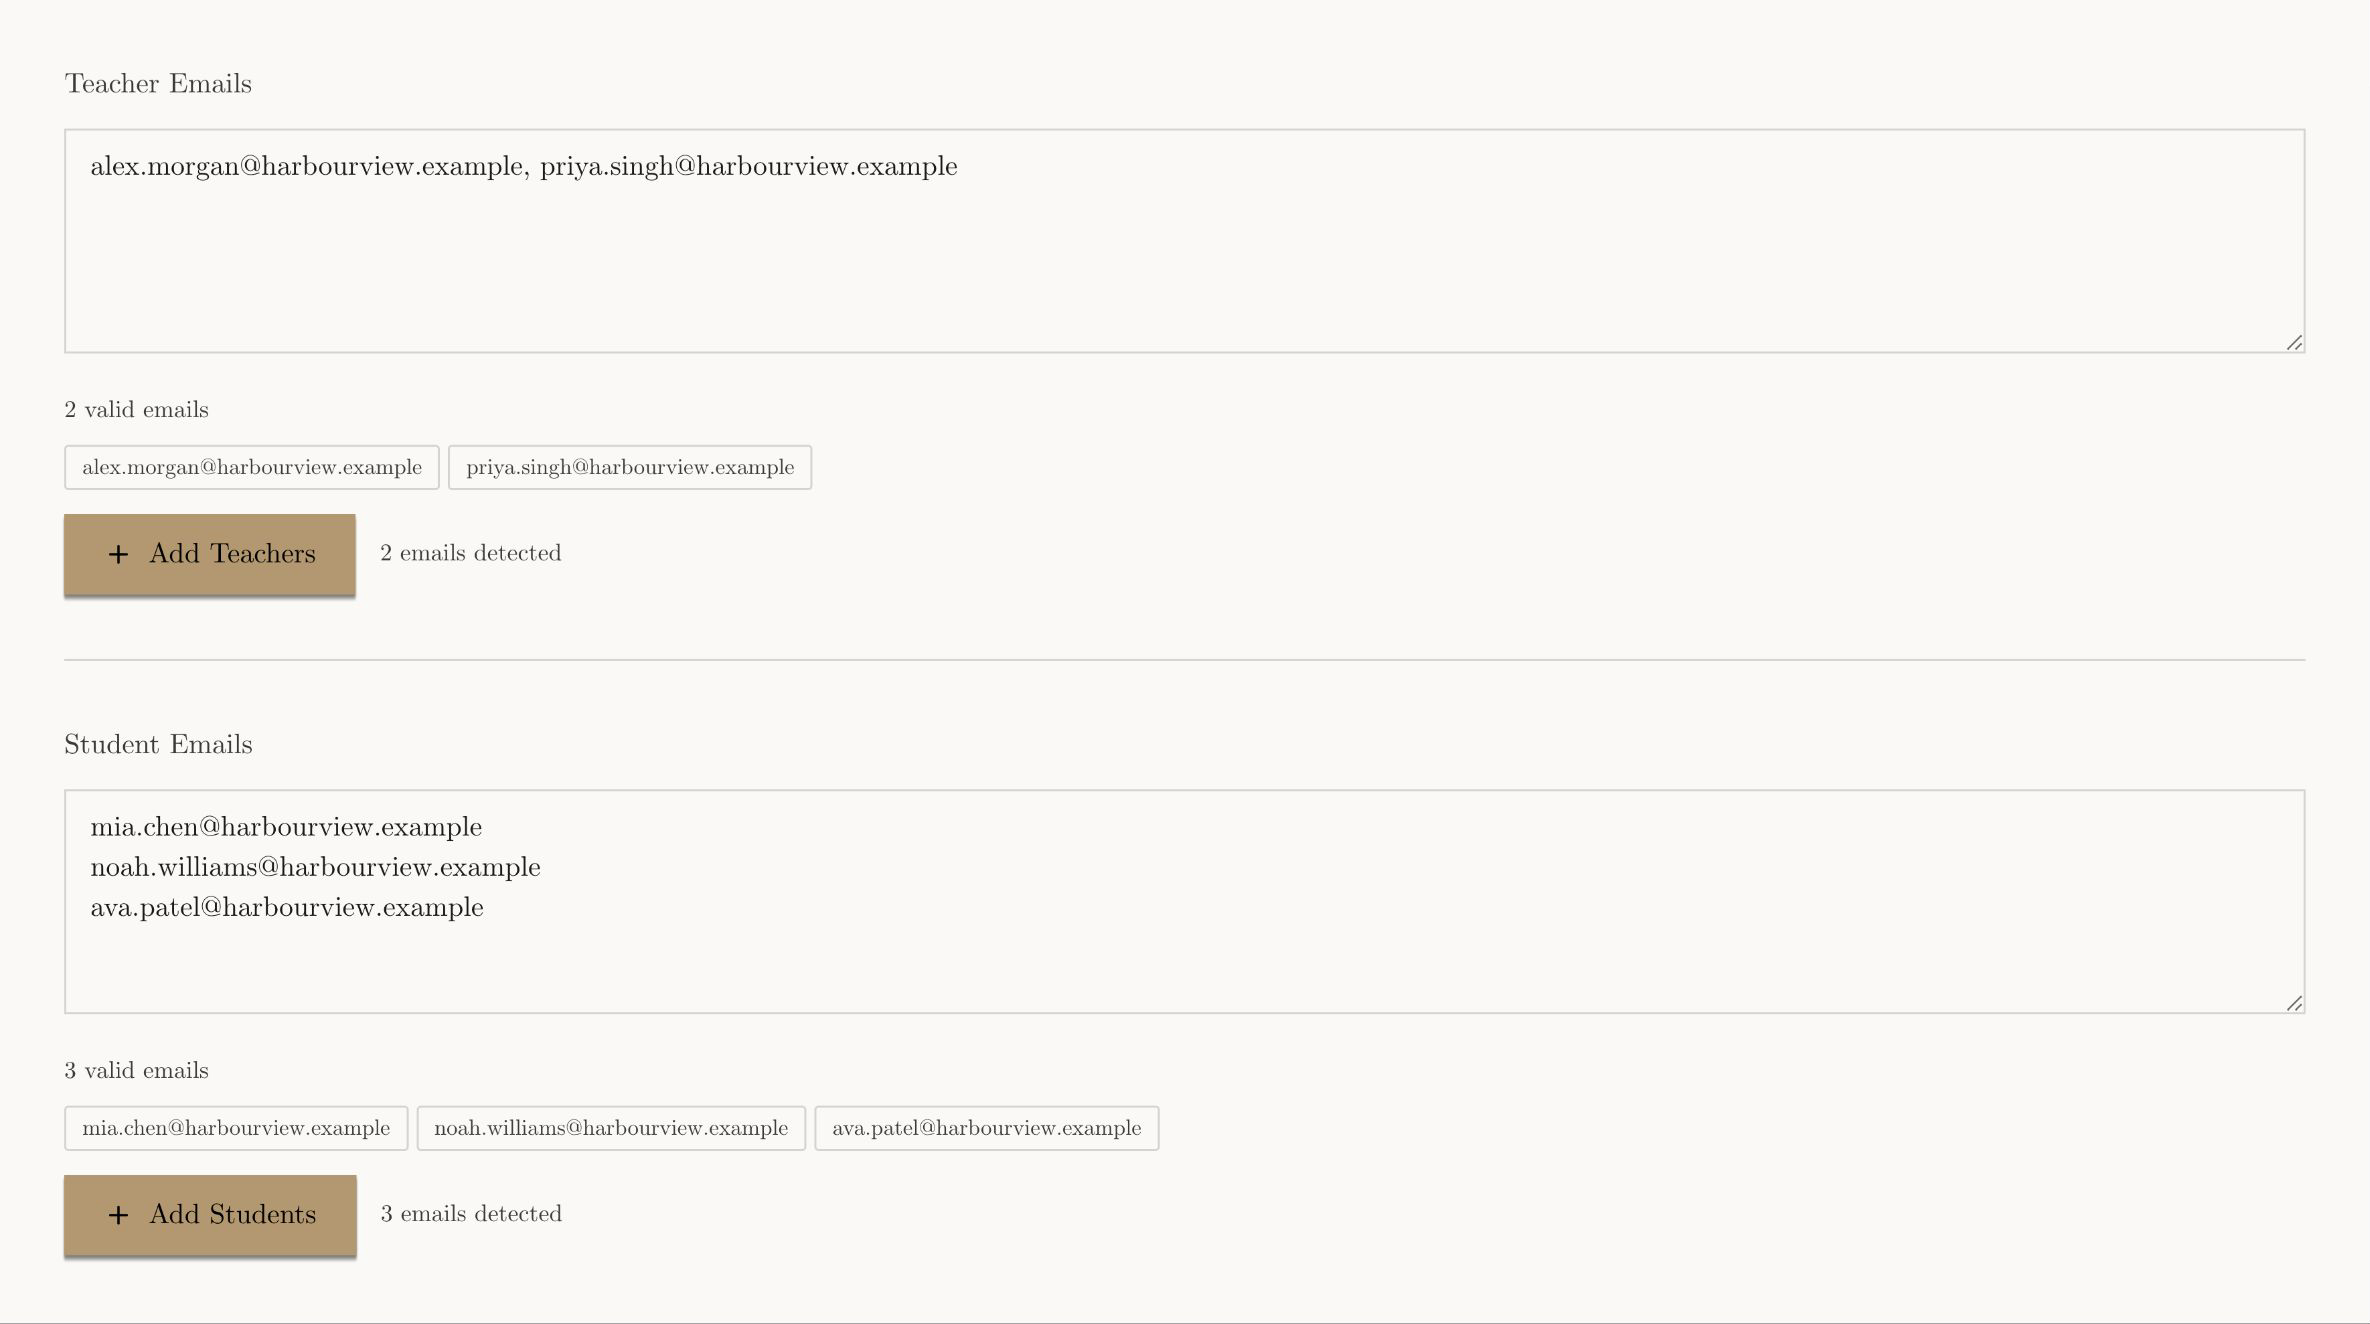
Open School Invite, then stay on Add Members. Add teachers in the first box and students in the second.

1

Paste teacher emails

Separate addresses with a comma, semicolon, or new line. Choose Add Teachers.
2

Paste student emails

Use the same format, then choose Add Students.
Light-mode Add Members screen with separate teacher and student email lists
Fig. 1. Add teachers and students separately. Leibniz shows how many valid addresses it found before you continue.
Key idea
Adding a person to the school does not always put them in a class. You choose the class next.

03What people receive by email

Invitation email
Sent to the address you added
1
Activate or sign in
Use that same email address
2
Ready to go
Classes appear after setup
3

Teachers receive an invitation to activate their teacher account. Students receive an invitation saying they have been added to your school. When you place someone in a class, they may also receive a second email that opens that class.

Do this
Ask everyone to open the invitation and continue with the same school email address you entered.

Emails are sent in the background and may take a few minutes. If one is missing, check Junk or Spam and confirm the address in Current Roster.

04Create classes

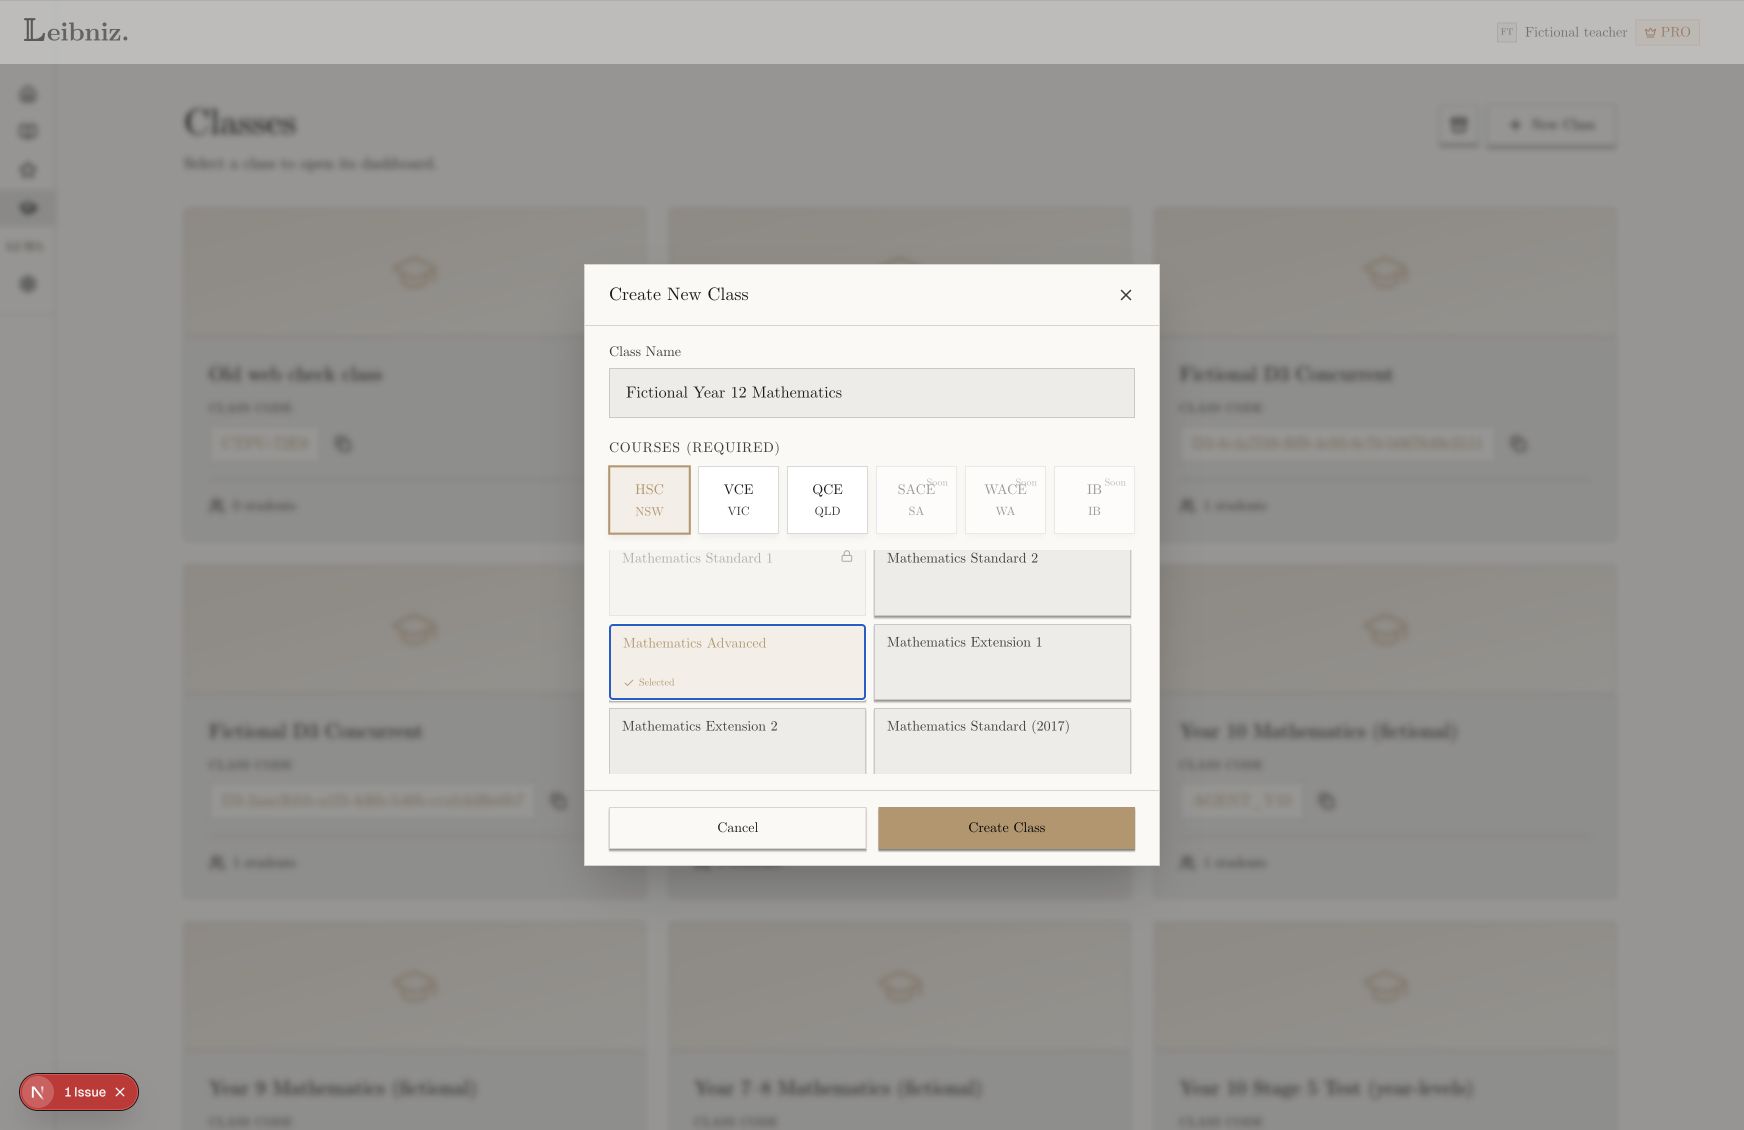
In School Invite, choose Create Classes. Complete one block for each class.

1

Choose your curriculum

Pick your state or programme. This shows the right course choices.
2

Name the class

Use a name students will recognise, such as Year 12 Mathematics Advanced.
3

Choose the teachers

Add the main teacher. Add a co-teacher only when both teachers need access.
4

Choose courses and students

Select at least one course, then paste the students for this class.
Light-mode Create Classes screen completed for a Year 12 Mathematics Advanced class
Fig. 2. A complete class block. Use Add Another Class to prepare several classes before choosing Create Classes.
Key idea
Students included here are added to the class automatically. They do not need the class code.

05Check the school list

Choose Current Roster. Use Classes to check class sizes and teachers. Open a class row to see its course and class code.

Light-mode Current Roster showing two active classes and an expanded class code
Fig. 3. Open a class row to see its teacher, course, and class code. The code is ready once the class is active.

Use People to check who is ready. The three labels are simple:

  • Pending invite: they have not activated their account yet.
  • Awaiting onboarding: they signed in but still need to finish setup.
  • Active: their account is ready.
Light-mode Current Roster People view showing active, pending invite, and awaiting onboarding statuses
Fig. 4. Switch to People to filter students and teachers or search by name, email, or course.

06Manage one class

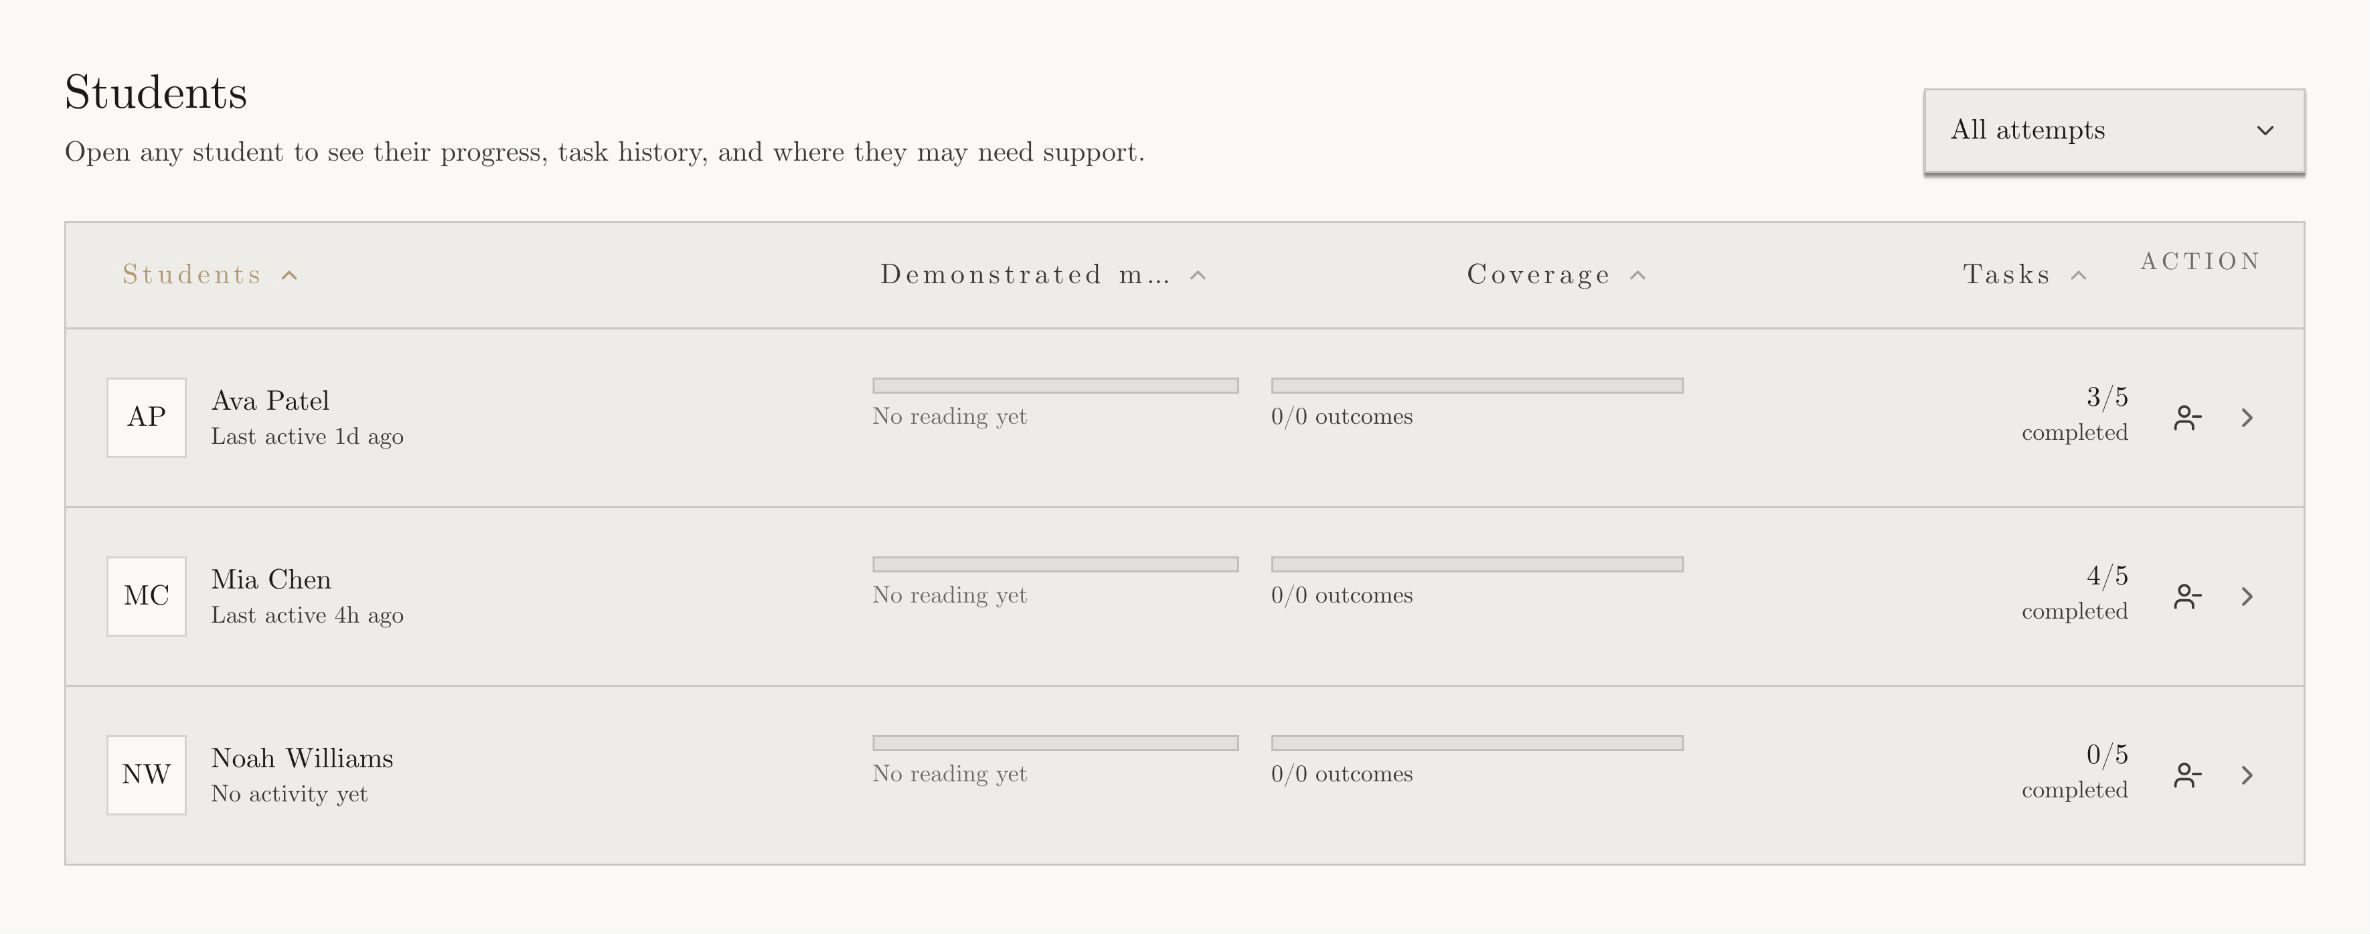
Open the class from your teacher home, then use its Students and Settings tabs.

1

Review students

The Students tab shows everyone currently in the class. Choose a student to view their work and progress.
2

Remove a student from this class

Choose the remove-person icon beside their name. Their saved work is kept unless you deliberately choose the delete-data option.
3

Change teacher access

In Settings, use Teachers to add a co-teacher or remove someone’s access to this class.
Light-mode class Students tab with three students and a remove-person action on each row
Fig. 5. The class Students tab. Use the remove-person icon at the right of a row to take someone out of this class.

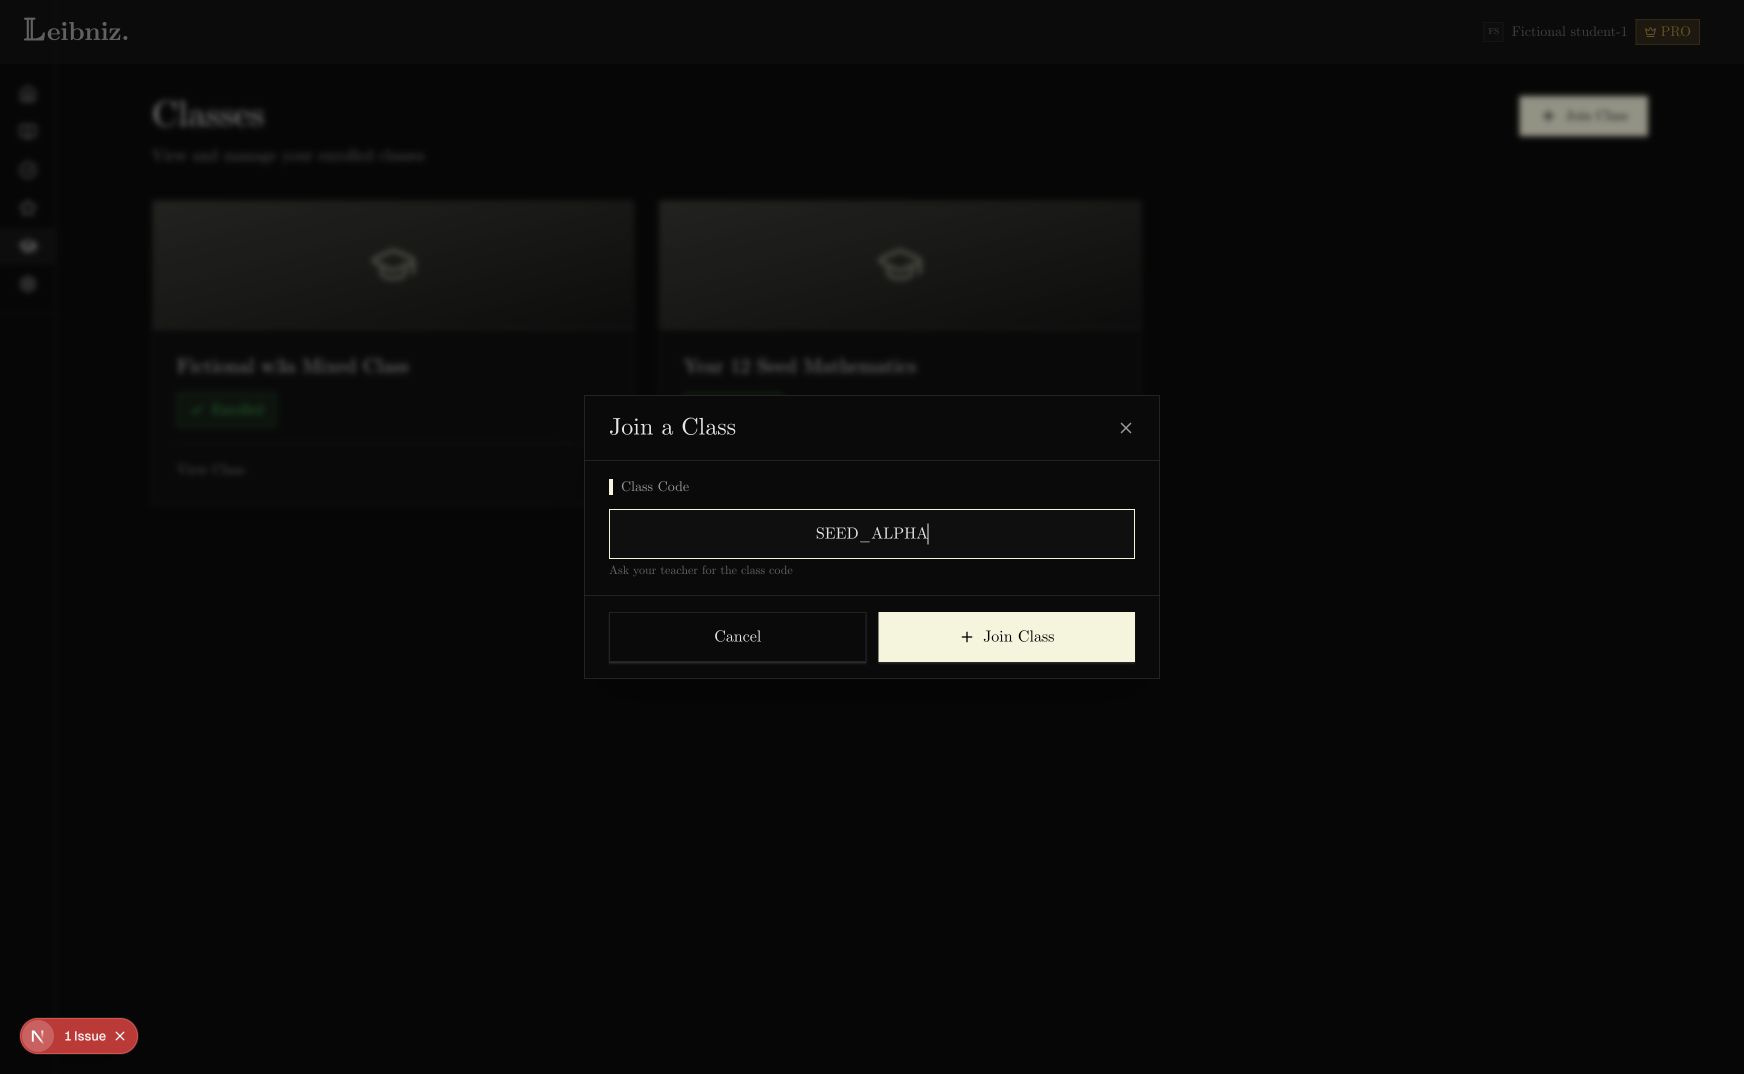
07Add a student later with the class code

The class code is for students who join after the class was created.

1

Add them to the school first

If they are new to Leibniz, add their email under School Invite → Add Members → Student Emails and ask them to activate their account.
2

Send the class code

Open the class and copy Class Code from the top of the page or from Settings.
3

The student joins

The student signs in, opens Classes, chooses Join Class, enters the code, then chooses Join Class again.
Light-mode Join a Class window with a Class Code field and Join Class button
Fig. 6. The student enters the code exactly as it appears in the teacher’s class.
Do this
If the code is rejected, copy it again from the class and check there are no extra spaces.

08Final check

  • Every teacher and student appears under Current Roster.
  • Each class has the right teacher, course, and student count.
  • Pending people know to check their school inbox and Junk or Spam.
  • Teachers know where to find their class code for late joiners.
Set up teachers, students, and classes · Leibniz Docs · Leibniz Docs